Step-by-Step Guide to Download Amazon Music to USB Drive on Computer and Phone
Amazon Music is a great platform to discover and stream songs from artists worldwide. But one of the major problems many users have to deal with is the inability to export their downloaded songs from the platform to other devices for offline listening. Even though you’re an Amazon Music Unlimited or Prime member, you’re not allowed to save your downloaded songs or playlists to your device’s local storage. If you’re wondering how to download Amazon Music to USB drive to be able to access your songs on more devices, we’ve created this guide to help you out. Here, you’ll discover the most effective methods to transfer Amazon Music to a USB drive, both from your computer and phone.
How to Download Amazon Music to USB Drive on Computer
Amazon Music’s DRM protection technology makes it very difficult for users to download songs to their USB drives. However, there are workarounds you can use to achieve your objective. In this section, we’ll introduce you to two ultimate tricks to download Amazon Music to USB drive on computer.
Way 1. Download Purchased Songs
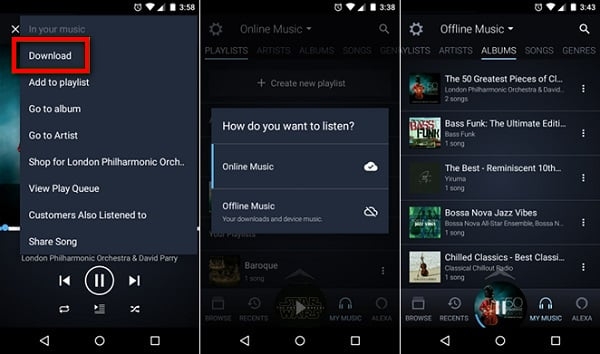
Amazon Music only allows users to download songs purchased individually to an external storage like USB drives. Even if you’re an Amazon Music prime or unlimited member, you’re not entitled to export simply-downloaded songs to other devices.
So, if you’ve purchased songs from Amazon Music, follow the steps below to download them to your USB Drive.
Step 1: Purchase Songs from Amazon Music
- Visit the official site of Amazon Music.
- Enter the song title into the search bar at the top and tap the search icon.
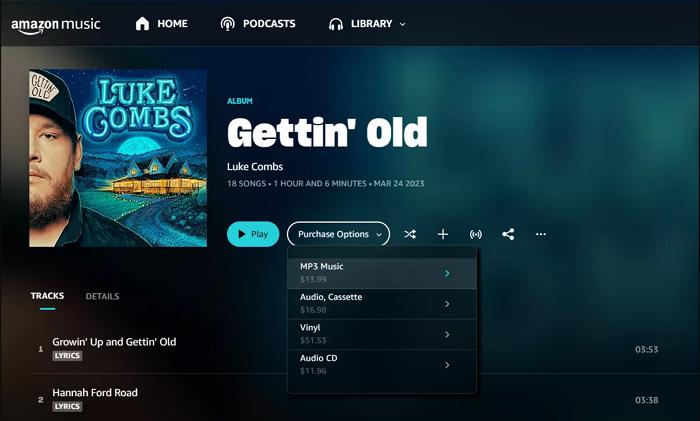
- In the target song page, click “Purchase Options” and choose “MP3 Music”.
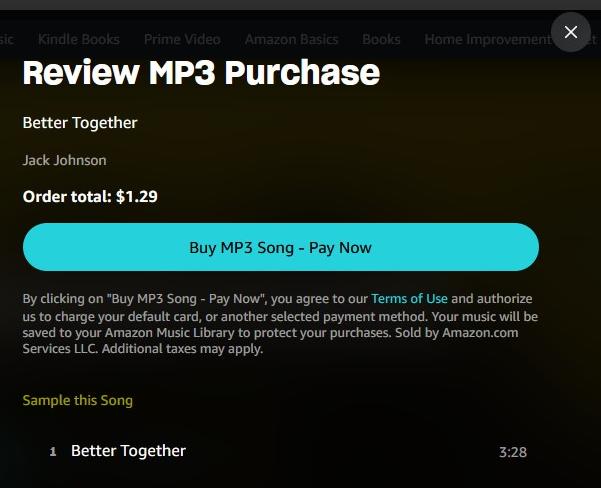
- Choose “Buy MP3 Song – Pay Now” and follow the steps to complete the purchase.
Step 2: Download Purchased Amazon Music Songs
Option 1: Download Purchased Songs via Amazon Music App
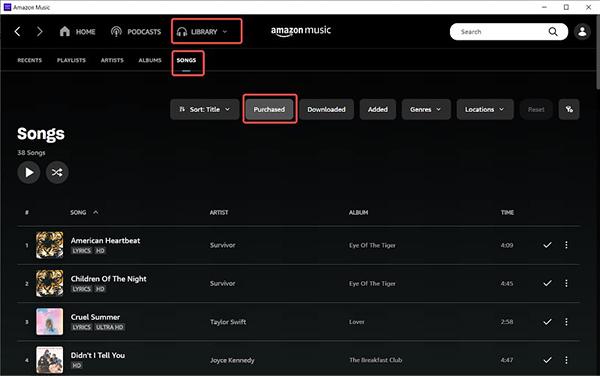
- Open the Amazon Music app on your computer and go to your “Library”.
- Select “Purchased” and click on the “Download” icon next to the song you want to download.
- The song will be saved to the “Amazon Music” folder on your computer. It’s stored under “My Music”.
Option 2: Download Purchased Songs via Amazon Web Browser
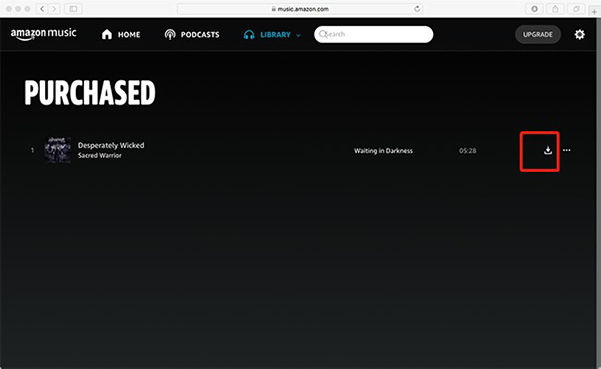
- Visit “www.amazon.com” and navigate to your “Library”.
- Go to the “Purchase” tab and click on “Download” next to the song.
- If you’re prompted to install the app, select “No Thanks”.
- Select “Save” to complete the operation.
Step 3: Transfer Downloaded Amazon Music to USB Drives
On Windows
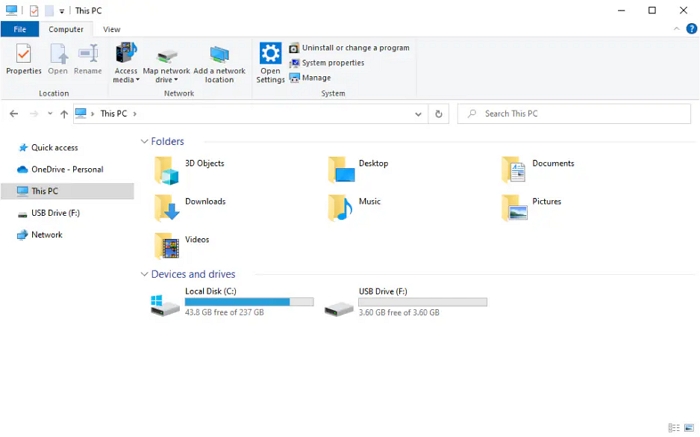
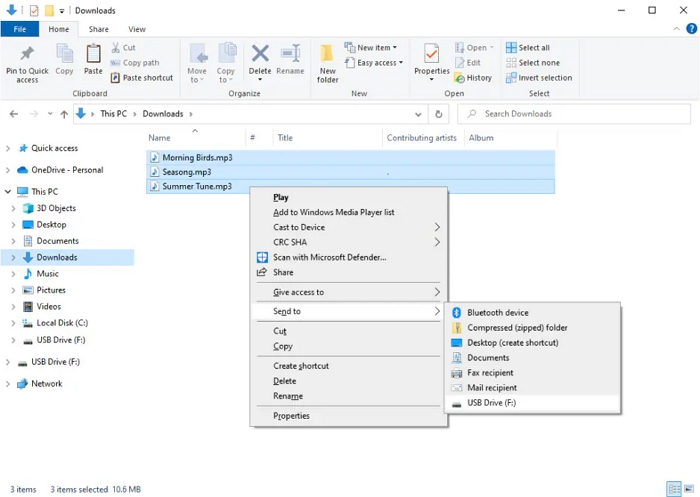
- Connect your USB Drive to the computer and launch “File Explorer”.
- Find the “Downloads” folder and select “Music”.
- Press “CTRL+A” and right-click on your mouse. Then, select “Send To” from the menu list.
- Choose the connected “USB Drive” and wait for the transfer to complete.
On Mac
Step 1: Connect the “USB Drive” to your computer and open the “Finder app”. You can find the USB Drive on the left-hand side of the Finder app.
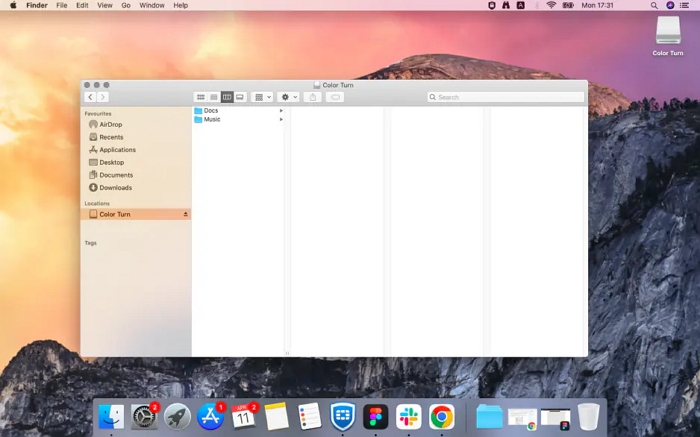
Step 2: Go to “Downloads” and find the “Songs” you want to migrate.
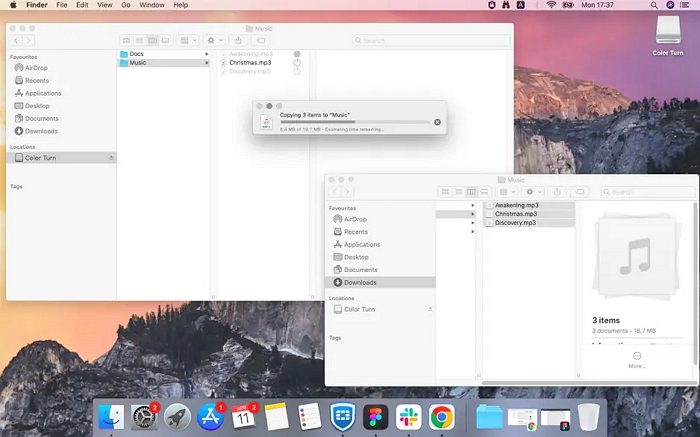
Step 3: Drag and drop the music files to the “USB Drive” to start copying it.
Way 2. Download Amazon Music Songs with StreamFox
If you haven’t purchased the songs from Amazon Music, don’t panic. A more effective way to get the job done is to convert the Amazon Music songs as MP3 with StreamFox for Music.
StreamFox for Music is a comprehensive music downloader suite that allows you to download songs as local files from various music streaming platforms, including Amazon Music, Apple Music, YouTube Music, and many others. This way, you can transfer the music downloads to another device like USB disks or phones without limitations. Furthermore, the song downloads can be in different formats like MP3, M4A, WAV, etc. It’s worth mentioning that this method is more cost-effective than purchasing MP3 files directly from Amazon Music. For just over $20, you can download unlimited songs for a month, whereas this amount usually only allows you to buy a few songs or one album.

- Download Amazon Music songs in batch at 50x faster speed.
- Maintain the original audio quality of the music in ultra HD resolution during the conversion process.
- Retain important metadata such as song title, artist, album, and artwork for organized music libraries.
- Offer a built-in web player that can be used to download and stream your songs instantly.
Steps to Download Amazon Music to USB Drive Using StreamFox
Step 1: Run “StreamFox for Music” and select “Amazon Music” from the main interface.
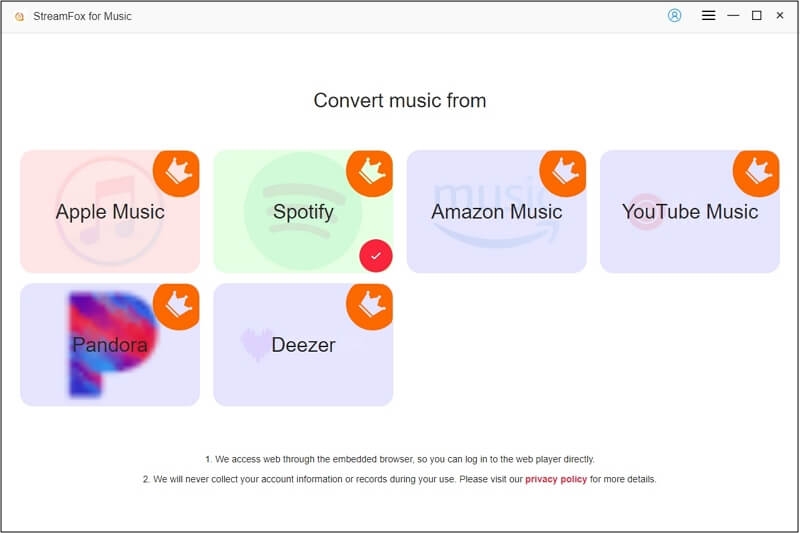
Step 2: Log in to your Amazon Music account (Prime or Unlimited or Free) by clicking Sign in and entering your account info.
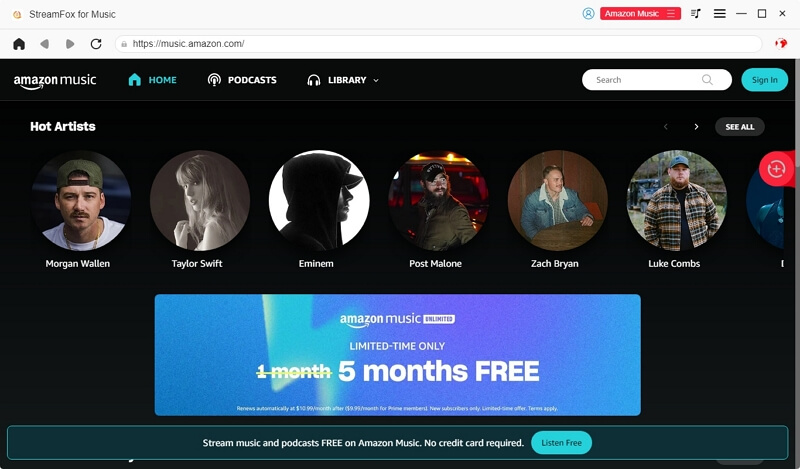
Step 3: Head to your “Library”. Then, drag and drop the songs you want to download onto the “Red icon” floating on the right-hand side.
![]()
Step 4: Choose the “output file format” as MP3 or other formats you want.
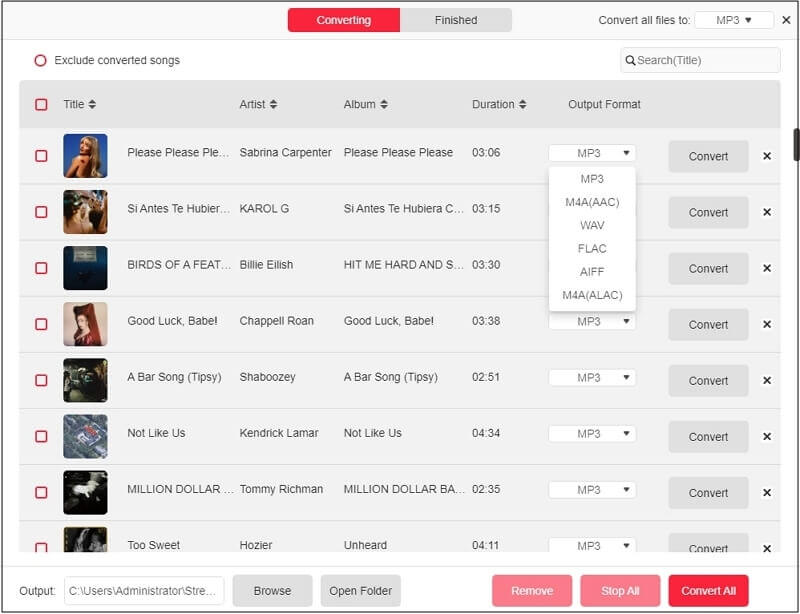
Step 5: Check the box next to the selected songs and click on the “Convert All” to start the download process.
Once the process is finalized, you can find the downloaded songs in the “Finished tab”. Click “View Output File” next to the track download and you will be lead to the folder where stores the files.
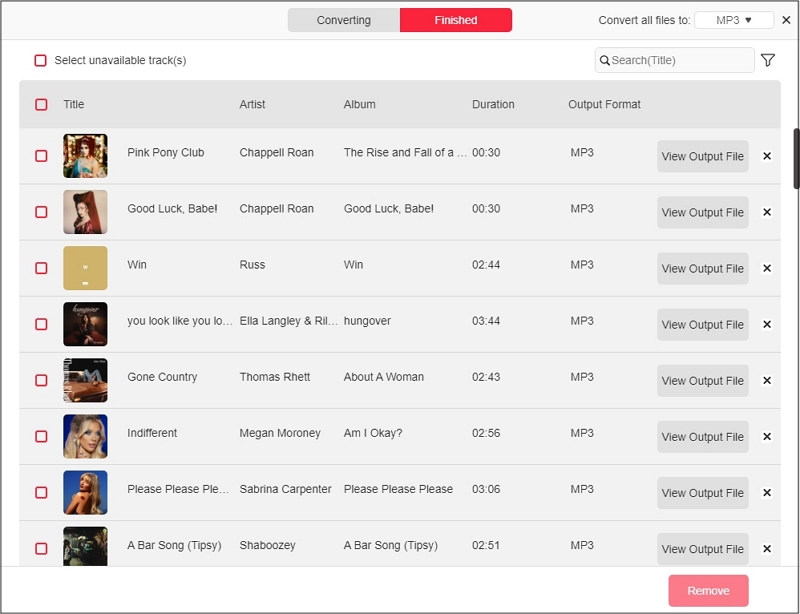
After you save the downloaded songs to your local storage, connect your USB drive to the computer and transfer the songs to the drive by following the step 2&3 on the part above.
How to Transfer Amazon Music to USB Drive on Phone
When it comes to transferring Amazon Music to USB Drives on the phone, the best way to go about it is to first download the song from Amazon Music to your phone local storage with a “Telegram bot”. Then, transfer the downloaded songs from your phone to the USB Drive. See the full step-by-step procedure below:
Step 1: Open your “Telegram” and search “@GlomaticoAmazonMusicBot”.
Step 2: Once you find the bot, join it and select “Start”. After that, “Verify that you’re human”.
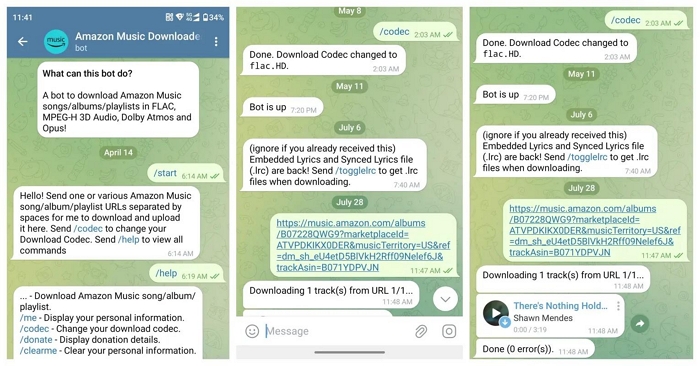
Step 3: Once you complete the verification, launch the “Amazon Music” app and find the song you want to download. Then, tap on the “three-dot icon” next to the song and select “Share” > “Copy Link”.
Step 4: Go back to the “Telegram bot” and paste the Song URL into the chat area. Then, tap on “Send”.
Step 5: Wait for the bot to provide a response. Then, download the “Music file” to your local storage.
After you’ve downloaded the music files, follow the steps below to transfer them from your phone to the USB Drive.
On iPhone
Step 1: Open the “Files” app and locate the “Music File”. Then, connect the “USB Drive” to your iPhone using a compatible connector.
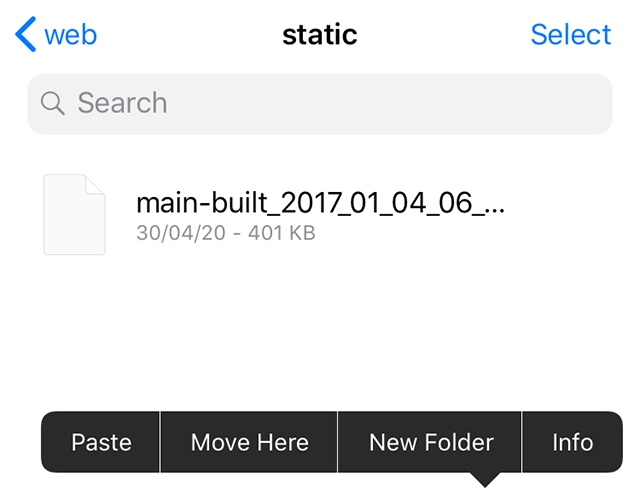
Step 2: Tap and hold the “Music file”. Select “Copy”.
Step 3: Navigate to the “Main interface” of the “Files App” and select the “USB Drive”. Hold down any blank area on your screen and select “Paste” to transfer the Amazon Music song to your USB Drive.
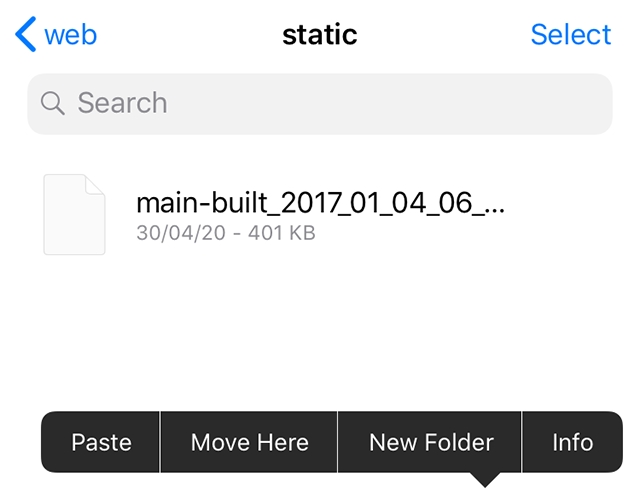
On Android
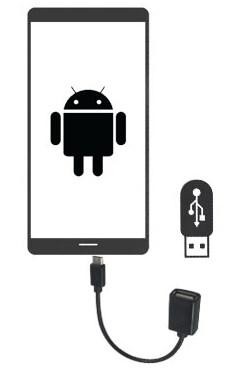
Step 1: Connect the “USB Drive” to your Android phone.
Step 2: Open “File Manager”. Locate the “Amazon Music Song” you downloaded and hold it down for a few seconds. Then, choose “Copy”.
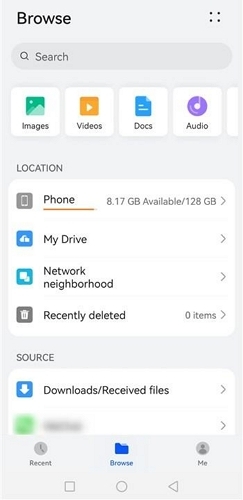
Step 3: Go back to the “File Manager” main page and choose the “USB Drive”. Then, paste the file there.
Conclusion
Downloading Amazon Music to a USB drive is not a straightforward process because Amazon Music does not support the transfer of downloaded music tracks to other devices. However, the article above has explained the best tricks to download Amazon Music on USB drives on your computer or phone without complications. Use StreamFox for Music if you’re looking to download bulk songs from Amazon Music to USB drives at a lower cost.


