How to Cancel Amazon Music Unlimited on iPhone/Android/Windows/Mac
You’ve probably enjoyed your Amazon Music Unlimited subscription to the fullest, particularly its ad-free music in lossless CD quality. Yes, it’s a good one but maybe Amazon Music works unstably on your device. Or maybe you just want to try another music streaming platform. If that’s the case, cancelling your present subscription is the best step to take.
If you’ve been wondering how to achieve this, don’t worry, we’ve explained the simple steps in this article. You’ll learn how to cancel an Amazon Music Unlimited subscription on your computer and smartphone. You’ll also see how you can retain access to your Amazon Music songs even after cancelling your subscription. So, make sure you read to the end. Let’s get started!
Before Cancelling Amazon Music Unlimited Subscription
Before you go ahead and cancel your Amazon Music Unlimited subscription, there are certain drawbacks you should have in mind. First, you’ll lose access to all the songs you downloaded previously. It’s probably surprising to you but the reason is that every song downloaded on Amazon Music is DRM-protected, making them only accessible when your subscription is active and can only be played from the Amazon Music app. Aside from the expired downloads, all the playlists and stations you’ve created or saved will become inaccessible. This means you can’t play them or make changes to them anymore.
How to Cancel Amazon Music Unlimited Subscription on Computer and Phone
The first way to cancel your Amazon Music Unlimited subscription is to do it straight from the Amazon website. Users who do this usually manage their subscriptions from their Amazon account. The good thing is that the process is easy as pie plus it can be done from your computer and smartphone too. We have listed the steps below:
Step 1. Visit the Amazon Music website from any of your browsers. At the site, log in to your Amazon Music with your account details.
Step 2. Now, from your dashboard, click “Settings” and choose “Your Amazon Music Settings”.
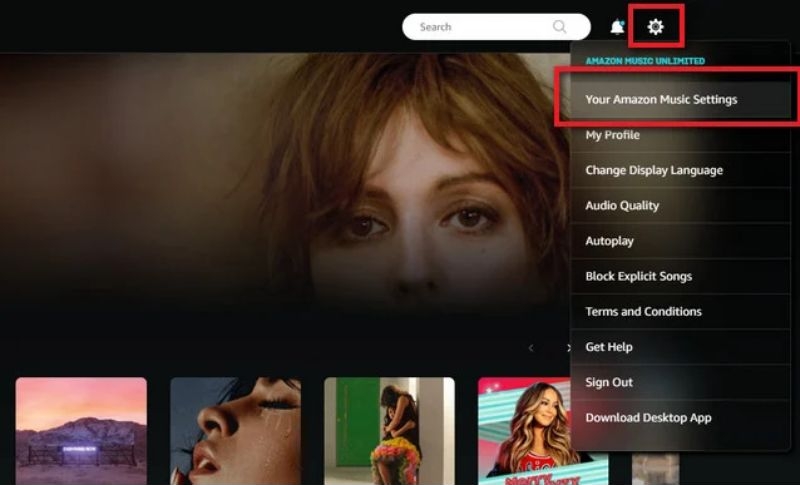
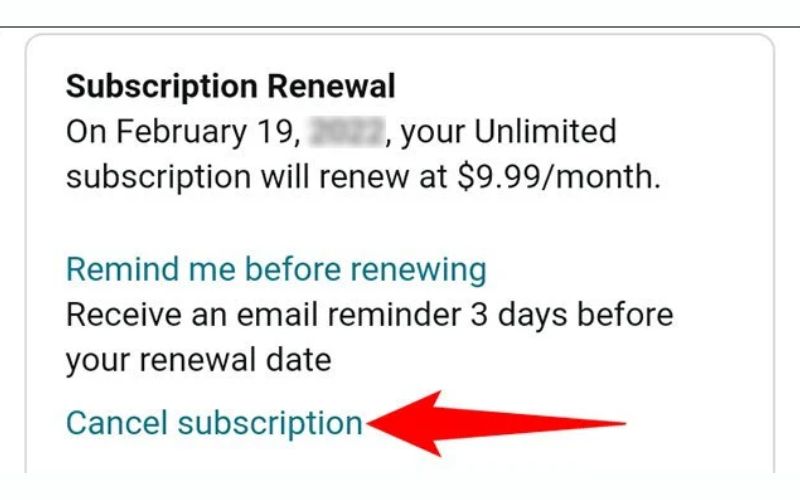
Step 3. On the Amazon Music Unlimited plan page, click on “Cancel Subscription” and then follow the onscreen instructions to confirm the cancellation.
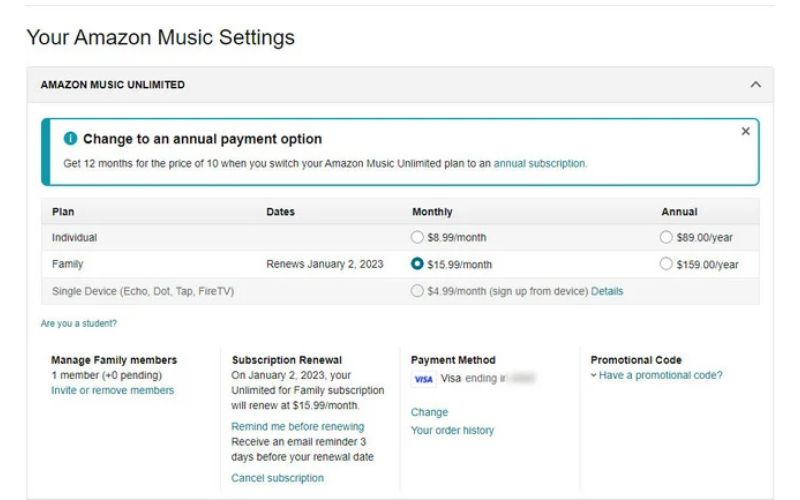
Bear in mind that the subscription cancellation doesn’t take effect immediately but will start at the end of your current billing period.
How to Unsubscribe Amazon Music Unlimited on Windows/Mac
If you didn’t subscribe to Amazon Music Unlimited from the Amazon website but rather used iTunes, this process is for you. You can try this on your Mac or Windows computer. Here are the steps to take:
Step 1. Open iTunes. Make sure that you’re signed in to iTunes with the Apple ID associated with your Amazon Music.
Step 2. Now, from the menu, click on “Account” and then select “View My Account” from the dropdown that appears.
Step 3. Find where the “Settings” section is, click on “Manage”, and select “Subscription.”
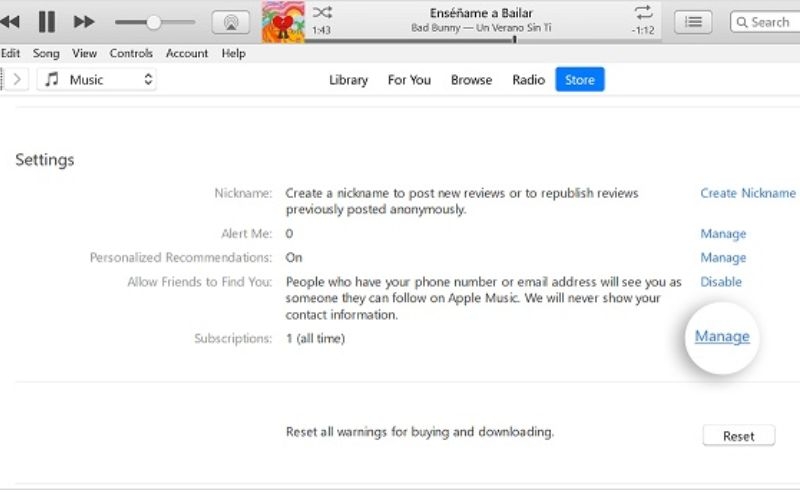
Step 4. You’ll see different active subscriptions from different platforms. Scroll to locate “Amazon Music Unlimited”.
Step 5. Click on “Edit”. You’ll see a new page pop up, just choose “Cancel subscription” and follow the prompts to confirm your cancellation.
Even as you’ve cancelled your subscription, it will only take effect from your next billing cycle. That is to say, your current subscription stays until it’s expired.
How to Cancel Amazon Music Unlimited Subscription on iPhone/Android
Some smartphone users manage their Amazon Music Unlimited subscription either through the Amazon Music app, Apple ID for iPhone users, or Google Play for Android users. If you fall under this category, these steps are for you.
For iPhone
Way 1. Through Settings App
Before cancelling your Amazon Music Unlimited subscription on your iPhone, ensure that you have the latest Amazon Music app installed. Then follow the steps below to cancel your subscription:
Step 1. Open the Amazon Music app on your iPhone and go to “Settings”.
Step 2. From there, scroll down and choose “Music Setting” from the dropdown.
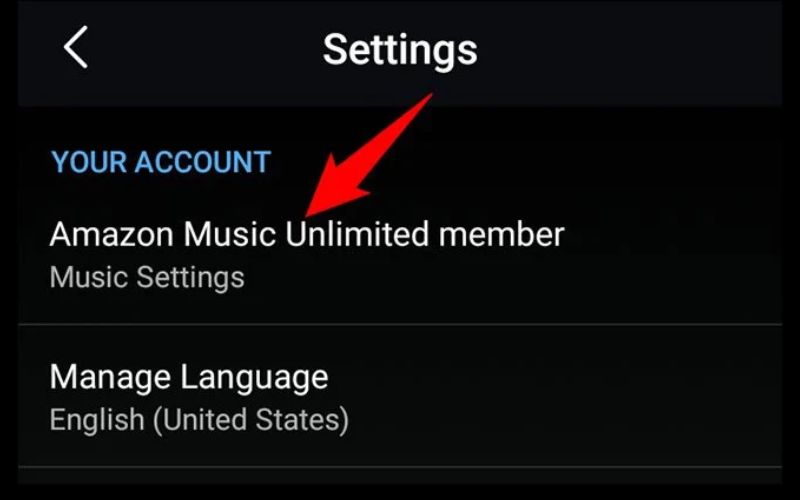
Step 3. A window will pop up, tap on “Cancel Subscription” and subsequently confirm your request.
Way 2. Via Apple ID Site
Cancelling your Amazon Music Unlimited subscription via your Apple ID settings is also an easy task. However, ensure you have your username and password secured. Here are the steps to follow:
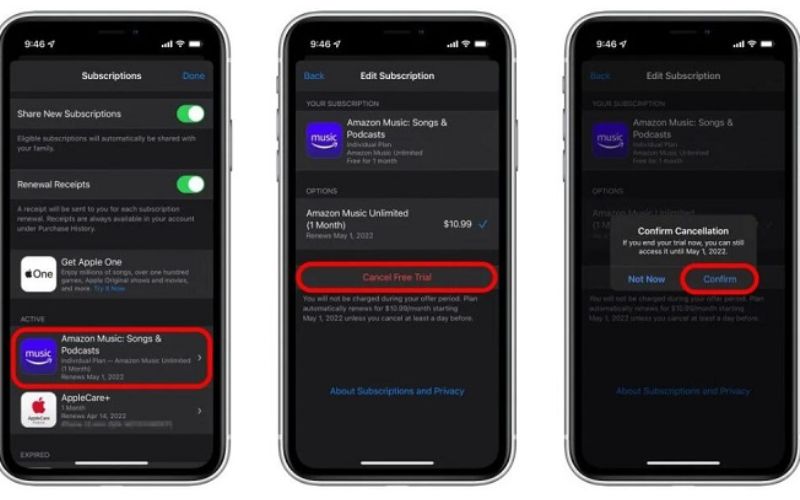
Step 1. Access the “Settings” app on your iPhone, go to the top screen, and tap on your name. This gives you access to your Apple ID settings.
Step 2. Click on “Subscriptions” from the list of options available. You’ll see all your active subscriptions, choose “Amazon Music: Songs & Podcasts” from the options.
Step 3. Finally, tap on “Cancel” or “Cancel Free Trial,” then confirm your cancellation.
For Android
Option 1. Use the Amazon Music App
Like iPhones, you can also cancel your Amazon Music Subscription from the Amazon Music app. The process isn’t complicated at all but you must have the app installed on your phone. Below are the steps to follow:
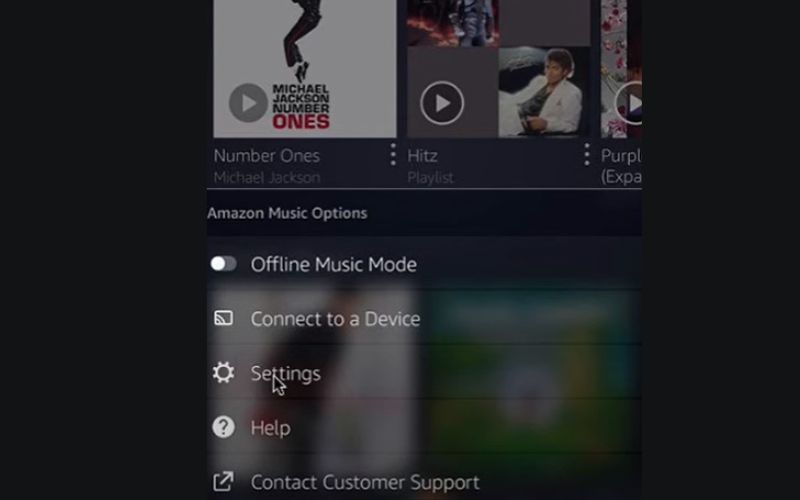
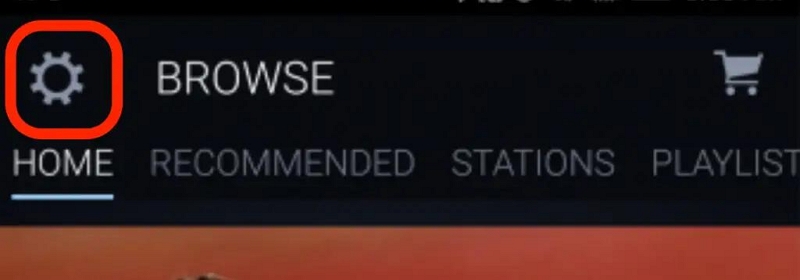
Step 1. Launch the Amazon Music app, go to the menu, and click on “Settings”.
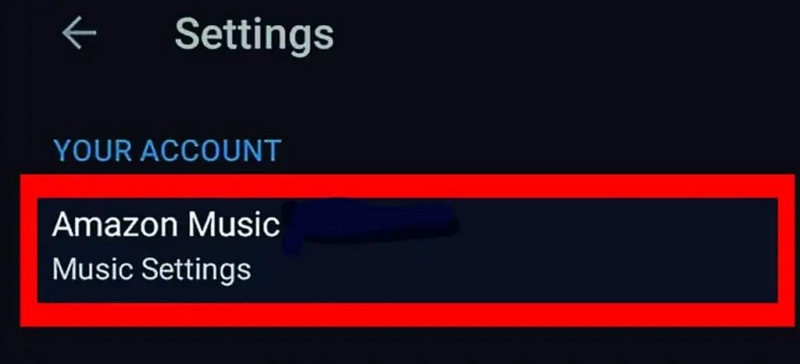
Step 2. Choose “Amazon Music Music Settings”.
Step 3. Finally, tap on “Cancel Subscription”. You will need to provide the reason why you unsubscribe from Amazon Music and hit “Submit and Confirm Cancelation” to complete the operation.
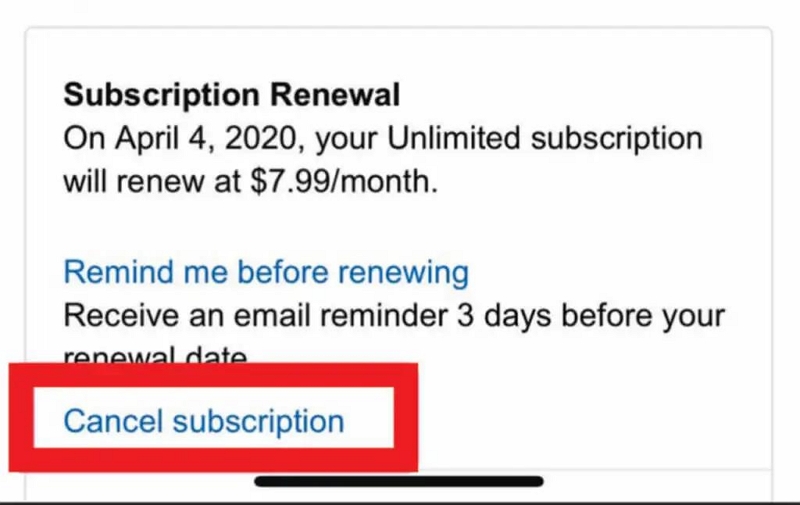
Option 2. Apply Google Play
If you’re managing your Amazon Music Unlimited subscription from your Google Play, you should follow the same route to cancel it. Here is how to do this:
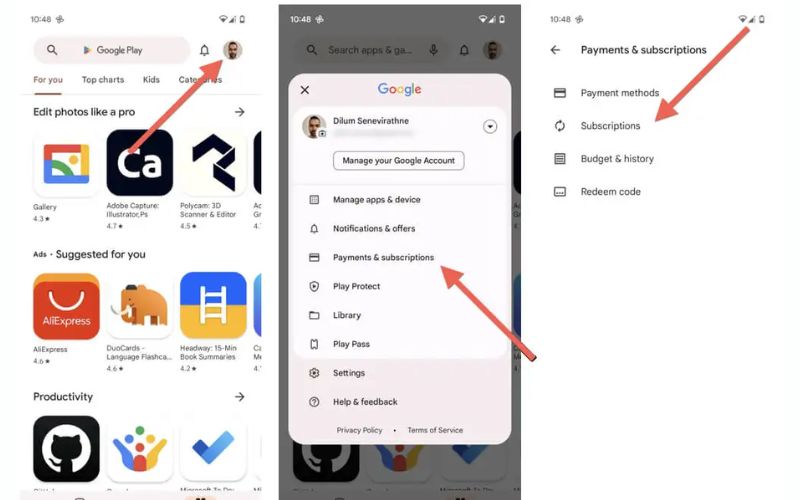
Step 1. First, you should open Google Play from your Android phone.
Step 2. Tap on your “profile avatar” > “Payments & subscriptions” > “subscriptions”.
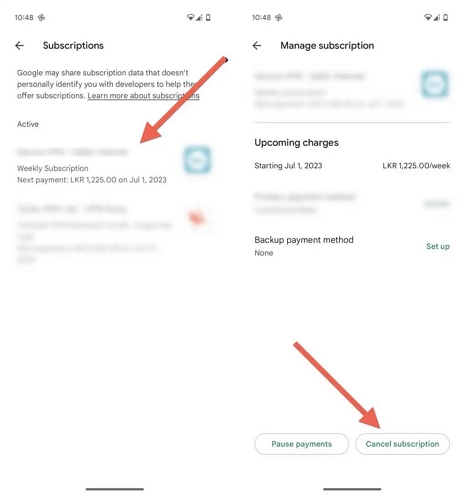
Step 3. Scroll down to find “Amazon Music”. Choose “Cancel subscription” and confirm it afterward.
So, there you have it – the best ways to bring down your Amazon Music Unlimited subscription! You have to deal with the nightmare that all the songs you’ve downloaded will be wiped permanently. But not to worry, in the next section, we will show you how to keep your favorite tunes after cancelling your subscription.
How to Keep Amazon Music Downloads Even After Cancelling Subscriptions
If you want to retain access to your Amazon Music downloads after unsubscription, you can convert them to MP3 formats with third-party tools. Doing this takes away the DRM protection placed on these tunes which ensures that they are only played from the Amazon Music app. Without the protection, they can be played from any device and it doesn’t matter whether your subscription is cancelled.
StreamFox for Music is highly recommended for this conversion because it retains the true lossless quality of the songs. Thanks to its ODSMRT technology, it doesn’t just record or fetch the songs like most tools, rather, it takes it a notch higher by saving the songs in their original quality or high quality without modifying the data. The songs are also saved in different formats, such as MP3, FLAC, M4A, and WAV. Besides, the batch download feature saves you time, as it’s done at a 50X speed.

- Save songs in high quality (up to 320kbps and 48khz).
- Download the ID3 tags of music for easier media management on your device.
- Have a built-in and native Amazon Music player.
- It’s super safe with zero ads or viruses.
That said, here are the steps to follow when downloading your favorite tune from Amazon Music Unlimited with the StreamFox for Music:
Step 1. First, you should download and install the StreamFox for Music software on your Windows or Mac.
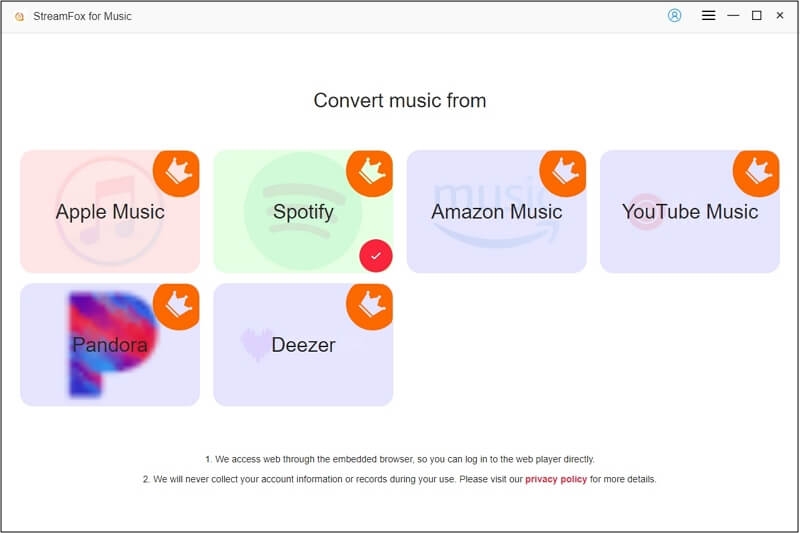
Step 2. When you open the software, you’ll see different converters, choose Amazon Music converter.
Step 3. Click “Sign In” in the upper right corner and log in with your Amazon Music account details.
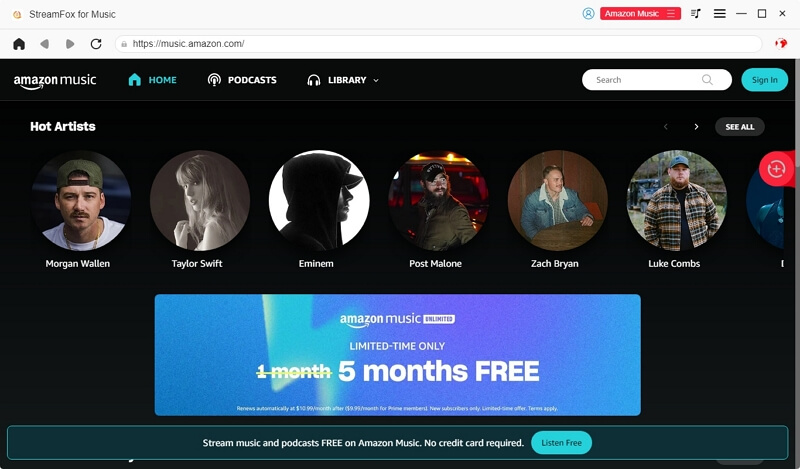
Step 4. Next, find and drag the music you want to download to the conversion icon represented with the “+” sign.
![]()
Step 5. From the conversion list window, select your desired audio output format – MP3, FLAC, M4A, AIFF or WAV. Also, click “Browse” at the lower end of the screen and choose the storage location for the songs.
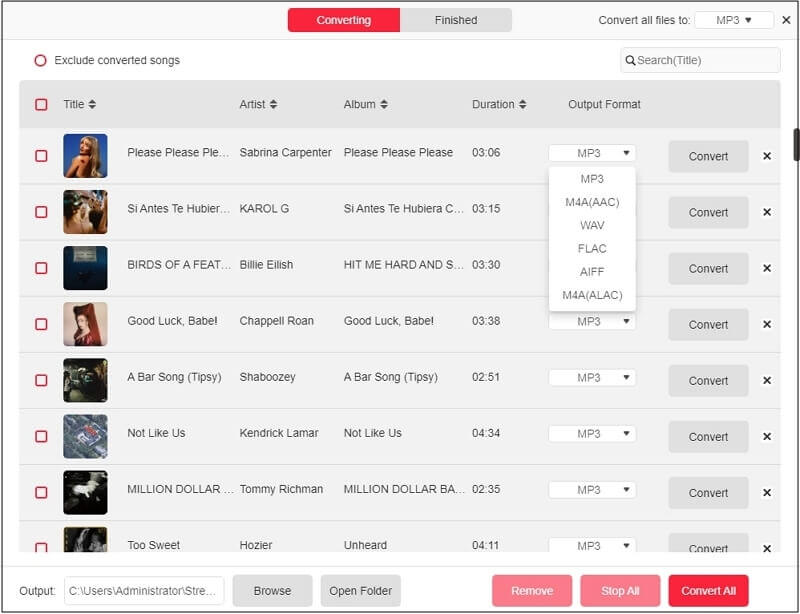
Step 6. Finally, click on “Convert All” to download your favorite Amazon tracks.
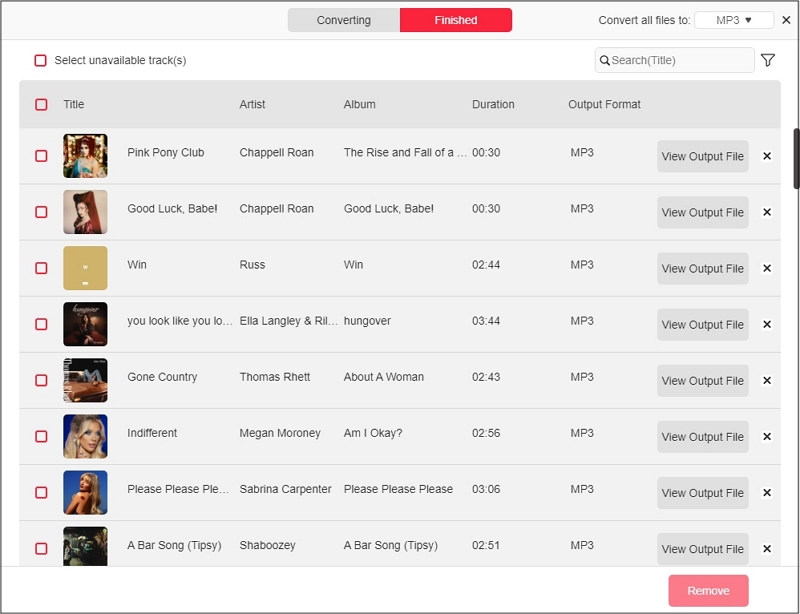
When you’re done, your downloaded songs are saved on your computer. You can click “View Output File” in the Finished section to locate the music downloads. Additionally, it’s available to transfer them to your phone or MP3 player and play them from there.
Conclusion
To wrap it up, you’ve seen the different ways to cancel your Amazon Music Unlimited subscription. You can do it from the Amazon Music website on your computer or through the Amazon Music app on your phone, etc. If you hope to download your Amazon Music as a backup so that you can access them even after unsubscription, use the StreamFox for Music. The software saves the original Amazon Music in a few clicks. Get it today and elevate your offline listening experience for your favorite tunes!


